How To Build a Media Wall – A Step-by-Step DIY Guide
Over the recent years, media walls have become incredibly popular in transforming any room into a stylish and organized space. From my own DIY experience, one of the first things I noticed was how much they help reduce clutter by keeping all your entertainment equipment neatly stored. You can build one that truly becomes a focal point, blending decorative features like an electric fireplace, open shelves for displays, and useful storage space for hiding cables, electronics, and other unsightly items. It doesn’t just make your living area look more elegant, but it also helps improve the aesthetic appeal of your house.
When I first started building my own media wall, I found it to be a fairly challenging job, but totally doable if you have the right tools and solid preparation. The key is to take time with the planning stage. Whether you’re incorporating a TV into a partitioned wall that resembles a chimney breast, or want a seamless finish, each element must fit perfectly. In this guide, I’ll walk you through the step-by-step construction process, share a materials list, and include valuable tips that I wish I had known earlier. When done right, the result is always flawless, aesthetically pleasing, and fully customized to your needs.
What is a media wall?
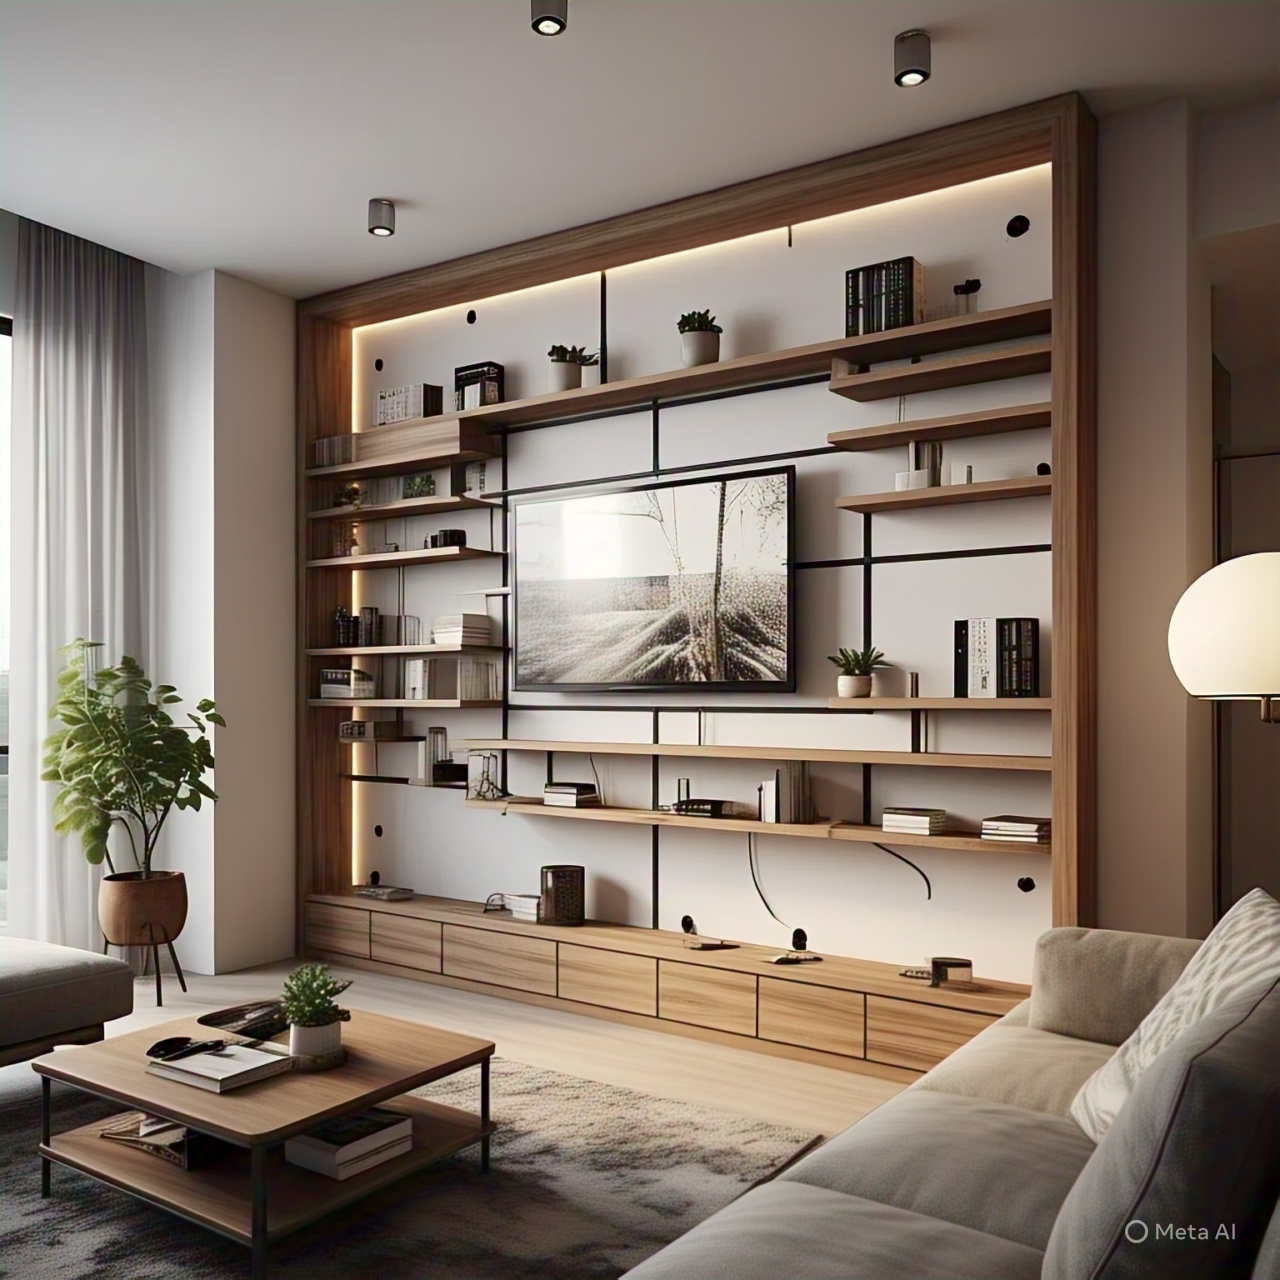
A media wall is more than just a place to mount your TV—it’s a custom, designed solution that transforms any room into a clean and stylish space. I remember working on one in my living room, where I built the wall on top of an existing one. The idea was simple: reduce clutter by creating an organised structure where all entertainment equipment could be stored, displayed, and enjoyed. The wall, also known as a TV feature wall, was created on the basis of both purpose and style.
The goal was to provide a single setup for housing devices and hiding accompanying cables, which made the whole area feel more open and tidy. I added features like shelves, storage, and even an electric fireplace—all carefully planned to be within the structure. These additional elements truly enhances the look and feel of the wall and increases its practical usefulness. Whether your design is minimal or bold, the possibilities are extensive. Your walls can become the focal point of the room, combining function and creativity. With the right plans, a media wall can turn your living space into something both stunning and smart.
Planning how to build a media wall
When you begin planning how to build a media wall, the first thing to assess is your room layout and the requirements of the appliances you’ll be using—TV, Freeview box, games consoles, and other devices. Think not just about the design, but also how you’ll enhance the overall focal point of the wall. In one of my first projects, I learned how essential it was to get the location and socket arrangement right, or it could all fall apart later. Whether you’re a skilled DIYer or just confident enough to tackle DIY tasks, laying out detailed plans is key.
Start by selecting your materials and tools with care. Many DIYers don’t realise how big a job it can be until they begin. For structure, you need to choose between a masonry or stud partition wall. Stud walls using timber studs, plasterboard, and screws are more adaptable for routing cables and electrics. I prefer CLS timber cut to 80 inches for vertical studs, with horizontal noggins for stability, using L-brackets where needed. Make sure to use woodscrews long enough—2.5 to 3 inches is common—to ensure everything is robustly attached from floor to ceiling. Your framework should be aligned parallel with ceiling joists and secured with a top and bottom plate.
Now comes the wiring and electrical part—this step can be intimidating. If you’re not a qualified electrician, don’t risk it. I always recommend hiring a competent and NICEIC-certified electrician to deal with sockets, power outlets, and ventilation needs for heat-producing appliances. A common mistake I’ve seen? Wiring placed incorrectly or removed during later steps. It’s smart to invest in specialist software or a digital sketch tool to map out every socket, shelf, and component before starting construction.
Finally, you’re ready to construct and finish your media wall. Accurately measuring the depth and size of your recessed spaces helps with housing equipment and planning storage like shelves. Don’t forget about plastering—a smooth surface can make your work look nice and professional. For those less experienced, hiring a plasterer can help achieve a clean finish, especially where beading and decorative LED lighting are used. This is where your creative eye can shine. Whether it’s adapting for appliances or adding a personal touch, the right design makes the space feel ideal.
What Depth Does a Media Wall Need to be?
When planning to build a media wall, one of the first things to determine is the correct depth it needs to have. From my experience, the minimum depth should be around 25cm to 30cm to provide ample space for everything you want to fit in, like the TV, fireplace, and their mounting brackets. It’s important to measure your TV and the mounting bracket accurately, including the fixing pieces, so nothing ends up protruding into the room unexpectedly. To keep the structure strong and stable, I’ve often used a thick wooden or MDF board—usually about 22mm to 35mm thick—as a support base behind the wall.
Before starting the setup, make sure to buy all your materials like boards, scaffold pieces, and fixings. You’ll want to have the total depth measured out precisely so the media wall looks clean and nothing sticks out. I’ve discussed with others and decided that having the right space behind the wall helps with ventilation and also allows for safe mounting. Using a similar setup with carefully placed brackets and fixings will give you a durable and neat finish. Every piece counts when you want the media wall to look great and function well without eating up too much room.
How Much Does It Cost to Build a Media Wall? (2025/26)
When planning to build a media wall, the total cost usually depends on materials, labour costs, and whether you’re hiring someone like a plasterer. For example, a typical project might cost around £600, with £300 spent on materials and another £300 charged for labour. The whole job can take about 10 hours to complete, so it’s important to take region and local rates into consideration. If you want to include a fireplace or mount a TV, you’ll also need the right hardware, such as a single-arm or dual-arm TV mounting bracket—the stronger and more flexible the bracket, the better it will ensure your screen stays straight, level, and mounted perfectly inside the opening.
To make your project smoother, it helps to create a detailed list of everything you need and links to where you can buy quality items for a fair price. Whether you’re tackling the job yourself or hiring pros, this planning can save you time and money. From my experience, choosing the right bracket—like a dual-arm one—makes a big difference, especially if your TV is heavy. Keep in mind that getting enough support around the fireplace and TV area is key to a perfect finish. If you’re unsure about hiring someone, check local prices because labour can be charged differently depending on your region.
How to build a media wall – a step-by-step guide
When I start the build, I usually construct the base using timber. The bottom plates are fixed into the floor, whether it’s wood or concrete—in the latter case, I use wall plugs and woodscrews. Then I raise the vertical lengths, spacing them to fit the mounts and bracket for the TV. These are attached to the top plates, which I secure to the ceiling joists using screws and L-brackets. Keeping the structure solid and neat is vital, especially if you plan to display heavier items or want all the wires hidden.
Once the structure is constructed, I usually cover it with MDF or plasterboard, depending on how smooth I want the finish. I mark the underlying surfaces to know where my fixings are and avoid future mistakes. I’ve seen people skip this stage, but if you want your plasterwork to look professional, hire a good plasterer. Let it dry well—especially in winter—before you sand it down using sandpaper. I then apply a mist coat (just emulsion mixed with water) to seal the porous surface, followed by a few good layers of paint in summer for quicker drying.
In the final decorating phase, I always make sure the skirting board fits back well. Sometimes I need to temporarily remove and reinstall it for a more neat finish. All instructions must be followed carefully, especially if certain fixings are included with your TV mounts. I prefer masking tape again to test paint boundaries or highlight important spots. Whether you’re aiming for something bold or minimal, a well-built media wall gives your room structure, depth, and purpose.
Faqs
Can I build a media wall myself?
Yes, you can build a media wall yourself if you have some basic DIY skills. It typically involves framing (often with timber or metal studs), installing plasterboard or MDF, running cables for power and AV, and finishing with paint or cladding. If you’re including a fireplace or complex wiring, you may need professional help for those parts.
How much will it cost to build a media wall?
Costs can vary depending on materials and complexity:
DIY basic media wall: £200–£600 ($250–$750)
With electric fireplace & shelving: £800–£1,500 ($1,000–$1,800)
Professional installation: £2,000–£5,000+ ($2,500–$6,000+)
Factors influencing cost:
Size and design complexity
Built-in fireplace or storage
Type of finish (paint, stone, wood, etc.)
What is the best material for a media wall?
Common and recommended materials:
MDF (Medium-Density Fibreboard): Affordable, smooth surface, easy to paint.
Plasterboard (Drywall): Lightweight, good for large areas, easy to finish.
Plywood: Stronger than MDF, can support more weight.
Timber studs: For framing the structure.
Best combo: Timber frame with MDF or plasterboard finish.
What is the cheapest way to build a wall?
The cheapest method:
Use timber studs and plasterboard (drywall).
Keep design simple—no fireplace, no complex shapes.
Do all labor yourself.
Paint finish instead of cladding or expensive veneers.
What thickness MDF for media wall?
18mm (3/4 inch) MDF is most commonly used.
Thick enough to support shelves or TV mounts.
Thinner MDF (12mm) may be used for decorative features, but not structural parts.
Why are media walls so expensive?
Media walls can be costly due to:
Custom design and carpentry
Built-in fireplaces or sound systems
High-quality materials and finishes
Professional labor and electrical work
Wall mounting and cable management
DIY significantly reduces costs, but complexity or a luxury finish will always raise the price.
For more article like this visit: Home Glow Up